
Boston Cream Pie Cookies: A Delicious Twist on a Classic Dessert Recipe take all the fun of that classic Boston Cream Pie—rich chocolate, creamy filling, and buttery cake—and transform it into adorable, handheld cookies. Whether you’re craving a nostalgic treat or looking to impress guests with something unique, these cookies hit every note perfectly. I love making them for celebrations or when I want a bit of cozy sweetness to brighten a regular day. If you adore desserts with layers of flavor and texture, you’re absolutely going to enjoy this spin on a well-loved classic.
Jump to:
What Makes This So Good
The magic of these Boston Cream Pie Cookies: A Delicious Twist on a Classic Dessert Recipe lies in their layered textures and flavors coming together in each bite — crispy yet soft cookies sandwiching fluffy vanilla whipped cream, all crowned with silky chocolate glaze.
- Big Flavor, Minimal Fuss: This recipe combines familiar pantry staples in a straightforward way to wow your taste buds without complicated steps.
- Family-Friendly: Kids and adults alike will adore the interactive fun of assembling and dunking these sandwich cookies in chocolate.
- Simple Ingredients: No exotic items here; just butter, sugar, cream, and chocolate you likely already have on hand.
- Works Any Night: Perfect for cozy weekends or last-minute dessert needs—you can whip these up even after work!
Ingredient Guide

Getting your ingredients right will set you up for success with Boston Cream Pie Cookies: A Delicious Twist on a Classic Dessert Recipe. Here’s how to think about picking and prepping them to get those perfect flavors and textures.
- Unsalted Butter: Softened to room temperature for easy creaming, unsalted lets you control the saltiness just right.
- Granulated Sugar: Provides crispness and sweetness; you can’t really swap this out without changing texture.
- Eggs: Large eggs keep the dough moist while helping with structure.
- Vanilla Extract: Use pure vanilla if you can—it makes a noticeable difference in flavor depth.
- All-Purpose Flour: The staple foundation, giving cookies that tender-but-not-dense crumb.
- Baking Powder & Baking Soda: Both help your cookies rise and get that light, cakey feel.
- Heavy Cream: For whipping into the luscious filling; colder cream whips better so chill it ahead.
- Powdered Sugar: Sweetens the cream filling without graininess.
- Semi-Sweet Chocolate Chips: Melts smoothly for the glaze, balanced between rich and sweet.
- Vegetable Oil: Mixed with chocolate for a glossy, smooth finish that doesn’t seize up.
Quick Reminder: Full measurements are in the recipe card below.
How to Make Boston Cream Pie Cookies: A Delicious Twist on a Classic Dessert Recipe
Step 1 — Prep & Ready
Start by softening your butter and warming your oven to 350°F (175°C). This helps the sugar cream up perfectly with the butter. Measure and sift your dry ingredients so there aren’t any lumps, and have your mixing bowls, spatulas, and baking sheets ready. When you're ready to portion your dough, I love using a cookie scoop to keep sizes consistent. Chilling the dough after mixing helps the cookies hold their shape and develop that tender crumb. Patience here totally pays off!
Step 2 — Cook with Confidence
Once your dough is chilled, scoop rounded balls onto parchment-lined sheets, leaving room for gentle spreading. Bake about 10-12 minutes—your nose will tell you when they're done with that being-gone-butter-and-vanilla smell filling the kitchen. Look for lightly golden edges while the centers still look a bit soft; they’ll set as they cool, keeping the cookies tender inside with that slight crisp you want on the outside.
Step 3 — Finish & Serve
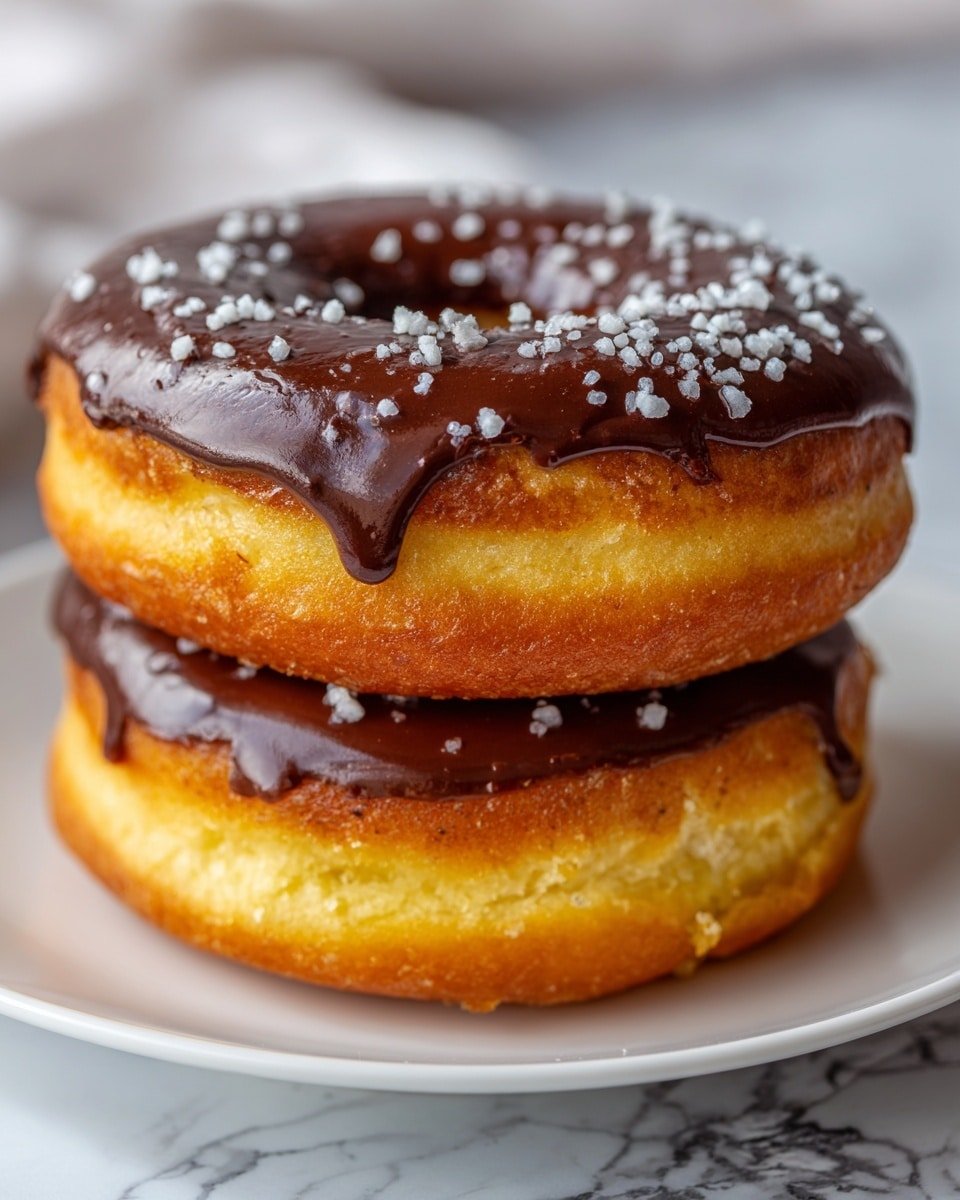
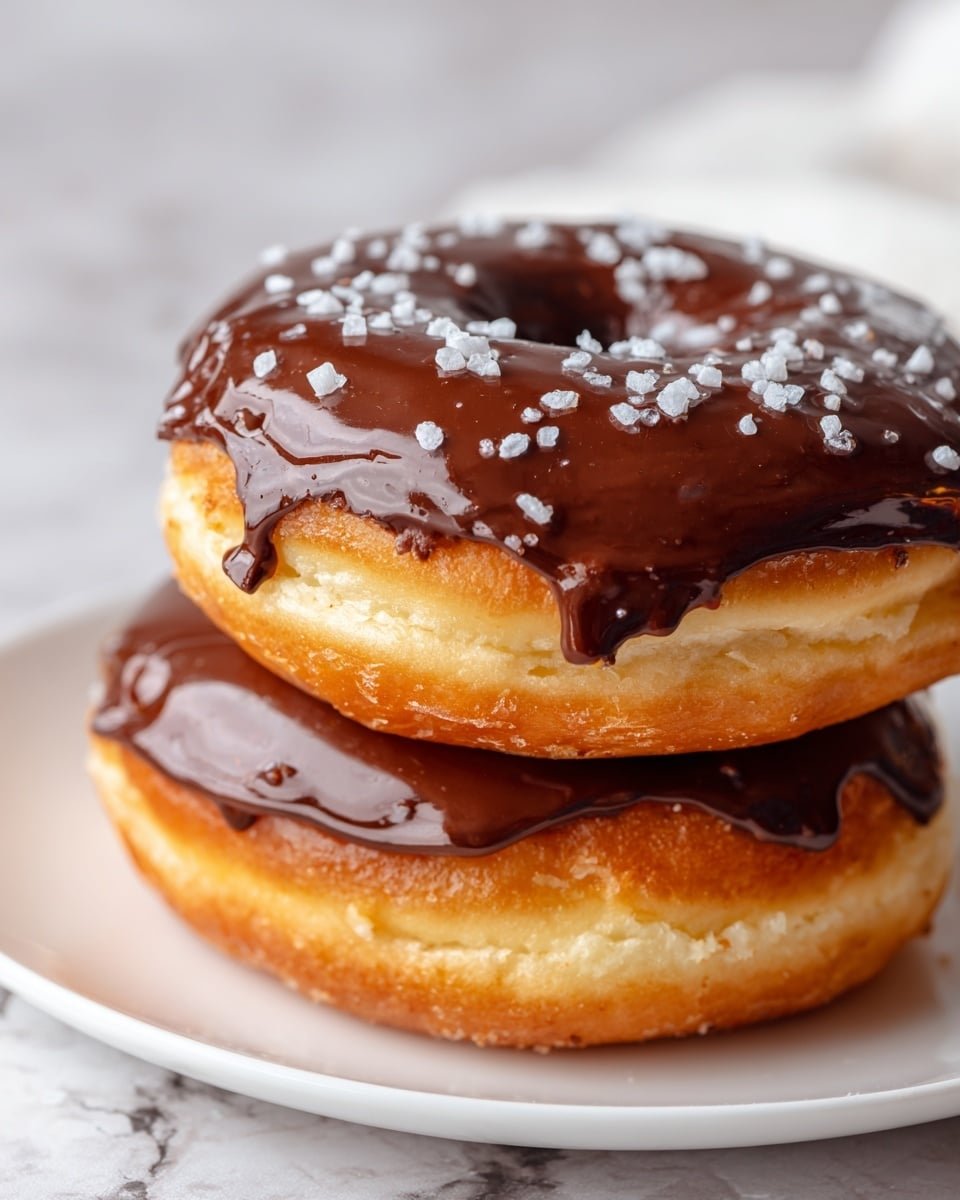
While your cookies cool, whip your chilled cream with powdered sugar and vanilla until stiff peaks form—not overwhipped though, or it turns grainy. This creamy filling is what makes Boston Cream Pie Cookies: A Delicious Twist on a Classic Dessert Recipe so memorable. After filling, melt your chocolate with vegetable oil in short increments to avoid scorching, then drizzle or dip each sandwich. Let the glaze set at room temp or briefly in the fridge for that irresistible glossy finish. Ready to savor!
Extra Helpful Tips
I’ve learned the hard way that the little details make a big difference when making Boston Cream Pie Cookies: A Delicious Twist on a Classic Dessert Recipe. It’s definitely worth taking a moment to prep well and watch the cues closely for best results.
- Watch for This Sign: When baking, don’t wait for the cookies to be fully golden—edges lightly tinted gold and centers still soft means perfection.
- Temperature Trick: Keep your heavy cream and mixing bowl really cold before whipping to get fluffy, stable peaks fast.
- Prep-Ahead Option: The dough can chill overnight, letting you bake fresh cookies whenever cravings strike.
- Avoid This Common Mistake: Don’t overmix the dough once flour is added; that keeps the cookies tender, not chewy or tough.
Serve & Enjoy
Easy Enhancements
Once you’ve nailed this base recipe, try swirling a little espresso powder into your chocolate glaze for a mocha twist that pairs beautifully with the creamy filling. Or sprinkle flaky sea salt on top of the chocolate while it’s still wet to add a savory pop that contrasts nicely. You could even mix orange zest into the whipped cream for a fresh citrusy note that brightens those rich flavors.
Tasty Pairings
These cookies shine alongside a cup of bold coffee or a creamy chai latte to complement their richness. For a celebratory vibe, pair with a glass of dessert wine or take them outside for an afternoon picnic with fresh fruit and sparkling water. They also hold up well with simple vanilla ice cream for an indulgent but approachable dessert plate.
Quick Plating Tips
Serve these cookies on a pretty platter lined with parchment paper or a colorful napkin for contrast. Scatter a few fresh berries or edible flowers around the edge for a splash of color. Dust a light sprinkle of powdered sugar over the top for a delicate, snowy finish. These small touches take your Boston Cream Pie Cookies from homey treat to party-ready star without extra fuss.
Store, Freeze & Reheat
Fridge Storage
You can store these cookies in an airtight container in the fridge for up to 3 days. You’ll notice the whipped cream filling stays light but the cookies might soften a bit from chilled moisture. I recommend letting them sit at room temperature for 15 minutes before enjoying to bring back some fresh-baked charm.
Freezer Friendly?
Yes! Freeze the cookie dough balls before baking for up to 3 months. Bake from frozen, adding a minute or two to the timer. Once assembled, I don’t recommend freezing fully completed Boston Cream Pie Cookies because the cream filling can get watery upon thawing, but you can freeze baked cookies alone to assemble fresh after thawing.
Reheat Like New
If you want to refresh a cookie, pop it in a 300°F oven for 3-4 minutes to warm the cookie without melting the cream filling. The microwave can make the filling break down, so I avoid that method unless you’re really in a hurry—then go for short bursts and watch closely. This way, you get that cozy just-baked aroma back with a perfectly tender bite.
Boston Cream Pie Cookies: A Delicious Twist on a Classic Dessert Recipe FAQs
While store-bought whipped cream can work in a pinch, homemade whipped cream adds a fresher, richer taste and stays firmer when sandwiched between cookies. It’s easier than it sounds and totally worth the little extra effort.
Microwaving in 30-second intervals and stirring in between is foolproof. Alternatively, use a double boiler to gently melt chocolate, which gives you more control and prevents scorching.
Yes! Substitute the all-purpose flour with a gluten-free blend that measures cup-for-cup. Just keep an eye on texture and slightly adjust chilling time if needed.
Assemble cookies shortly before serving and keep them chilled until then. If prepping ahead, store filling and cookies separately and sandwich them just before you eat to keep the cookies crisp.
Final Flavor Thoughts
There’s something truly special about Boston Cream Pie Cookies: A Delicious Twist on a Classic Dessert Recipe that makes any day feel a little brighter. If you loved this recipe, don’t forget to leave a star rating or share your favorite variation in the comments—I’m always excited to hear your twists! Next time, try swapping the chocolate glaze for caramel sauce or infusing the cream with your favorite liqueur for an adult-friendly surprise. Happy baking!
Print📖 Recipe
Boston Cream Pie Cookies: A Delicious Twist on a Classic Dessert Recipe

Boston Cream Pie Cookies combine the classic flavors of the beloved Boston Cream Pie into a delightful cookie sandwich. These soft, buttery cookies are filled with a luscious whipped cream and vanilla filling, then glazed with rich melted chocolate, making for a decadent twist on a timeless dessert favorite.
- Prep Time: 20 minutes
- Cook Time: 12 minutes
- Total Time: 1 hour 5 minutes
- Yield: 24 sandwich cookies
- Category: Baking
- Method: Baking
- Cuisine: American
Ingredients
Cookie Dough
- 1 cup unsalted butter, softened
- 1 cup granulated sugar
- 2 large eggs
- 1 teaspoon vanilla extract
- 2 cups all-purpose flour
- 1 teaspoon baking powder
- ½ teaspoon baking soda
- ¼ teaspoon salt
Whipped Cream Filling
- 1 cup heavy cream
- ½ cup powdered sugar
- 1 teaspoon vanilla extract
Chocolate Glaze
- 1 cup semi-sweet chocolate chips
- 1 tablespoon vegetable oil
Instructions
- Cream Butter and Sugar: In a large mixing bowl, use an electric mixer on medium speed to cream together the softened butter and granulated sugar until light and fluffy, about 3-4 minutes.
- Add Eggs and Vanilla: Add the eggs one at a time, mixing well after each addition, then stir in the vanilla extract until fully combined.
- Combine Dry Ingredients: In a separate bowl, whisk the all-purpose flour, baking powder, baking soda, and salt together. Gradually add this mix to the wet ingredients, mixing on low speed just until combined to avoid overmixing.
- Chill Dough: Cover the dough with plastic wrap and refrigerate it for at least 30 minutes to firm up.
- Prepare Whipped Cream Filling: In a medium bowl, whip the heavy cream with powdered sugar and vanilla extract using a hand mixer until stiff peaks form, about 3-5 minutes. Keep chilled until assembly.
- Preheat Oven and Prepare Baking Sheets: Heat oven to 350°F (175°C) and line two baking sheets with parchment paper.
- Scoop Dough: Drop rounded tablespoon-sized balls of dough onto the baking sheets, spacing about 2 inches apart.
- Bake Cookies: Bake for 10-12 minutes, until edges turn lightly golden but centers remain slightly soft.
- Cool Cookies: Let cookies cool on baking sheets for 5 minutes, then transfer to wire racks to cool completely.
- Melt Chocolate Glaze: In a microwave-safe bowl, combine chocolate chips and vegetable oil. Microwave in 30-second intervals, stirring between, until smooth (1-2 minutes). Let cool slightly.
- Assemble Cookies: Take one cookie, place a generous dollop of whipped cream on the flat side, then top with another cookie to form a sandwich. Gently press to spread filling to edges.
- Glaze Cookies: Dip or drizzle the assembled cookie sandwiches with melted chocolate, allowing excess to drip off.
- Set Glaze: Place glazed cookies on a wire rack until the chocolate sets.
Notes
- Chilling the dough helps prevent spreading for thicker cookies.
- Do not overwhip the cream to avoid turning it into butter.
- Cookies may appear slightly underbaked in the center—this ensures a soft texture.
- Use high-quality chocolate for the glaze for best flavor.
- Store assembled cookies in the refrigerator to keep the cream filling fresh.
- Serve chilled or at room temperature according to preference.


Leave a Reply