
Ooey-Gooey Cheesy Garlic Chicken Wraps Recipe is one of those comforting dishes that makes any day feel special. Imagine tender chicken mixed with creamy cheeses and a garlicky kick, all wrapped up in a warm tortilla that's crisped to golden perfection. Whether you’re in need of a quick weeknight dinner, a satisfying lunch, or a snack that’ll impress friends, these wraps hit all the right notes. I love how simple and adaptable this recipe is — even picky eaters tend to become instant fans, and the whole family will appreciate the cozy, cheesy goodness.
Jump to:
What Makes This So Good
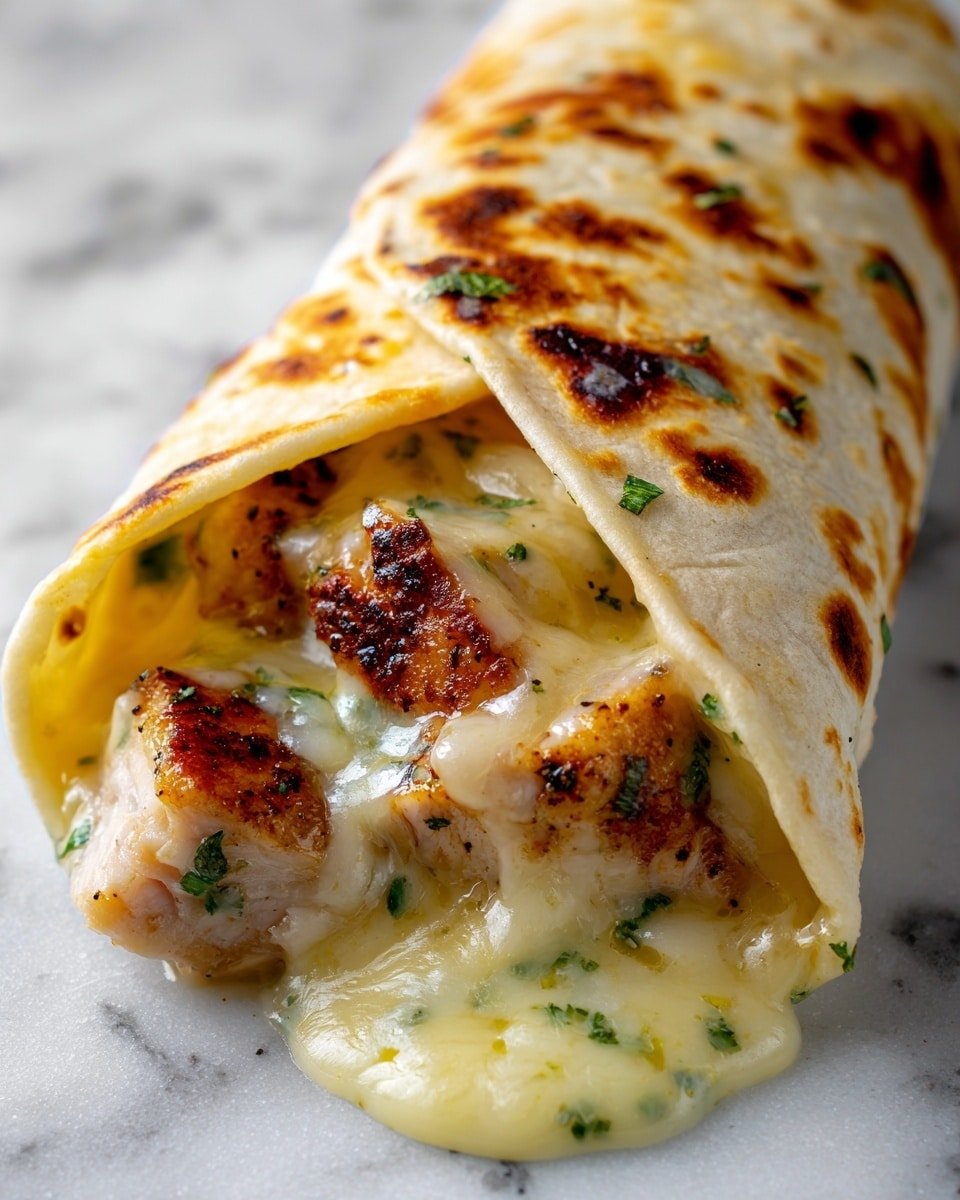
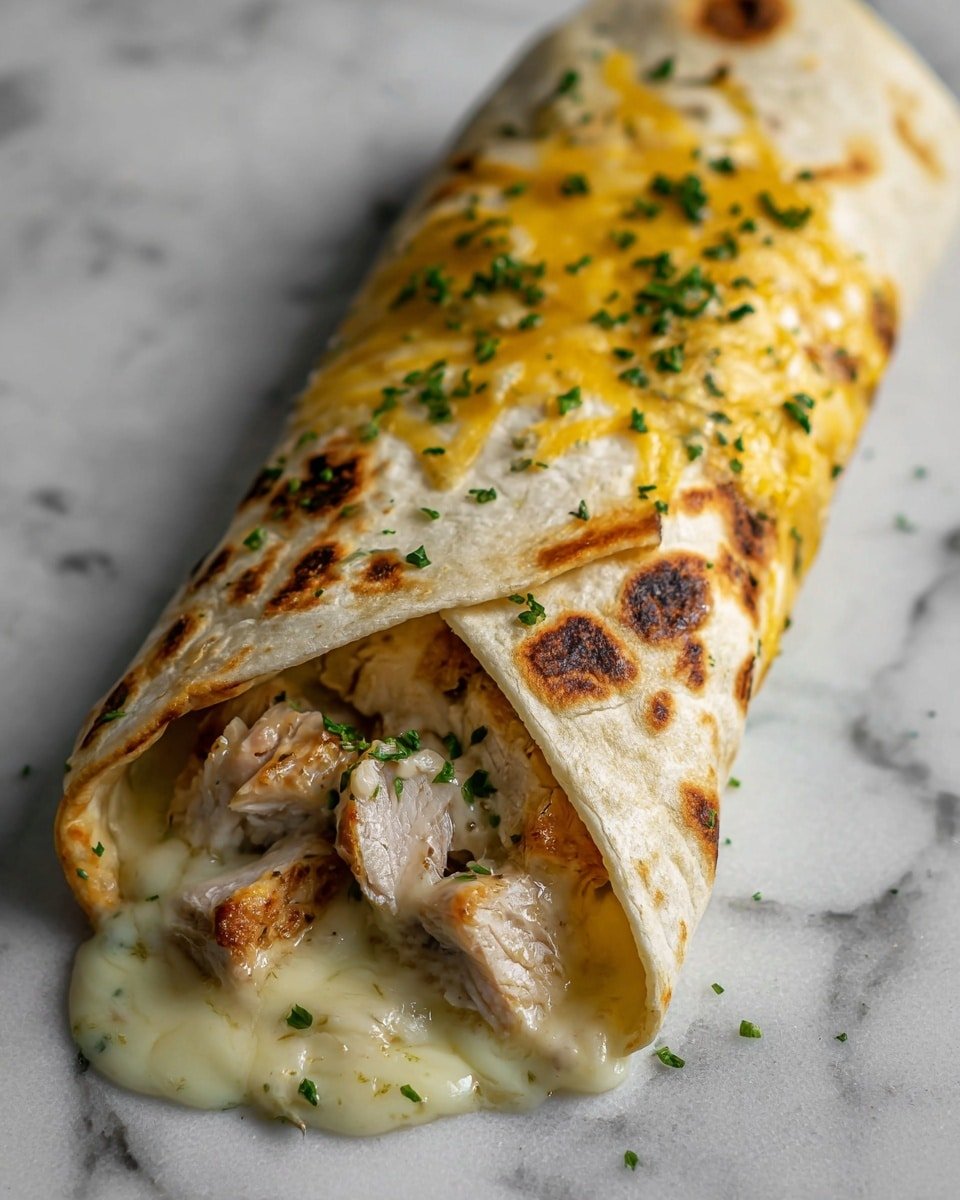
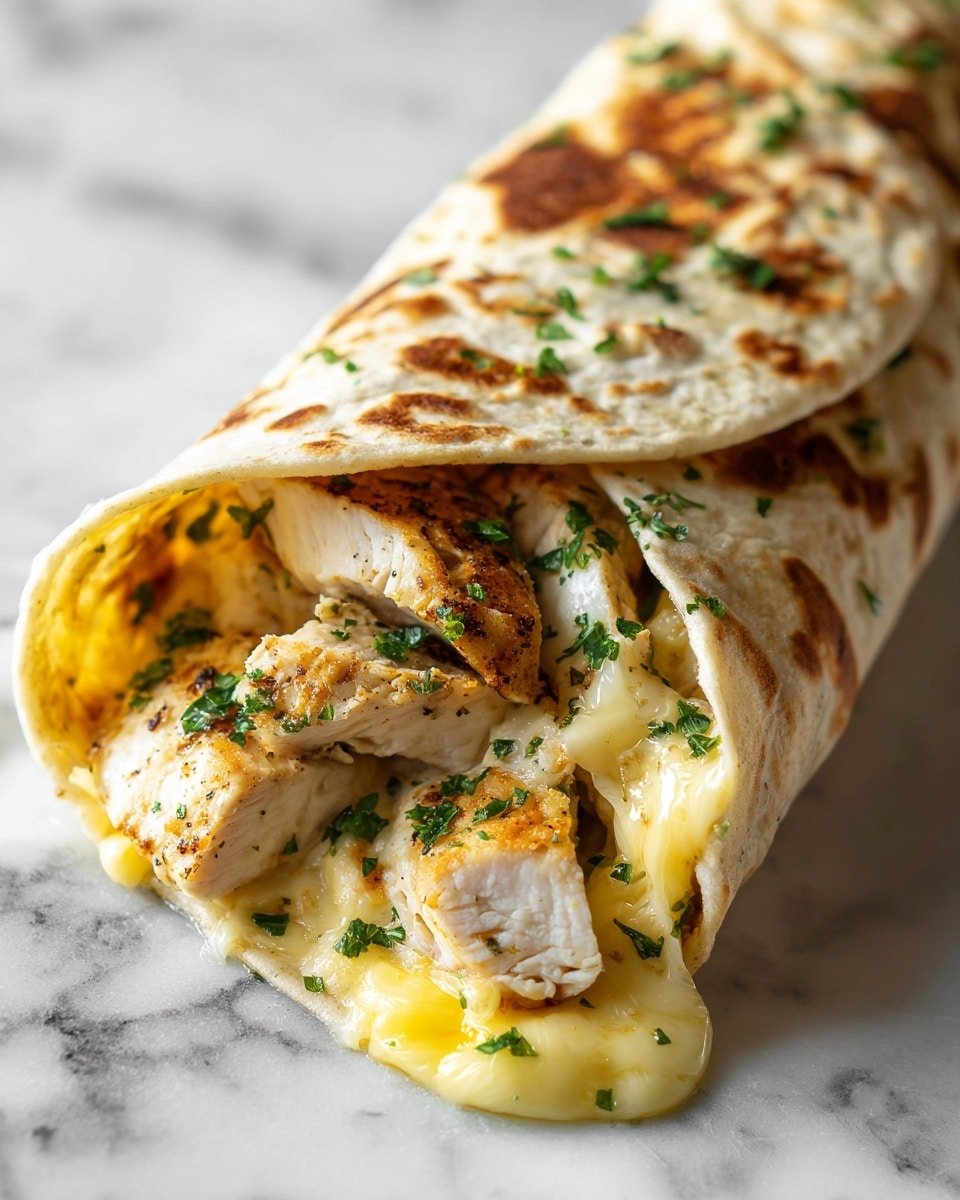
This Ooey-Gooey Cheesy Garlic Chicken Wraps Recipe brings a perfect balance of creamy, savory, and crunchy in every bite. The luscious blend of mozzarella and cream cheese melts beautifully around the garlicky chicken, creating a rich, velvety filling that’s hard to resist.
- Big Flavor, Minimal Fuss: Combining shredded chicken with a simple cheesy mix means maximum taste without complicated prep.
- Family-Friendly: Even kids love the mild cheesy flavor paired with tender chicken, making it a surefire hit.
- Simple Ingredients: You probably already have most of what you need at home, which is always a win.
- Works Any Night: Whether you’re rushing home from work or hosting friends, these wraps come together quickly and satisfy big time.
Ingredient Guide
Picking the right ingredients can elevate your Ooey-Gooey Cheesy Garlic Chicken Wraps Recipe from good to unforgettable. Here’s an easy guide to make sure every bite shines.
- Cooked Chicken: I prefer leftover roasted chicken for depth of flavor, but rotisserie chicken works wonderfully too.
- Mozzarella Cheese: Freshly shredded mozzarella melts more evenly—avoid pre-shredded bags that often have anti-caking agents.
- Cream Cheese: Softened cream cheese blends smoothly, giving that coveted creamy texture.
- Garlic: Fresh minced garlic brings a pungent, bright hit that you just can’t get from powders.
- Fresh Parsley: Adds a pop of herbaceous freshness and a subtle color contrast.
- Large Tortillas: Look for soft flour tortillas that’re pliable but sturdy enough to hold your filling without tearing.
- Olive Oil: Using a good quality olive oil in the skillet helps achieve a golden, crispy crust.
- Salt & Pepper: Simple seasoning boosts the flavors and balances all the richness.
Quick Reminder: Full measurements are in the recipe card below.
How to Make Ooey-Gooey Cheesy Garlic Chicken Wraps Recipe
Step 1 — Prep & Ready
Start by shredding your cooked chicken into bite-sized pieces—don’t rush this part because uniform pieces ensure every wrap tastes consistent. Mix together your shredded chicken, mozzarella, softened cream cheese, minced garlic, and freshly chopped parsley in a large bowl. You’ll notice how creamy and fragrant the mixture gets right away. Season gently with salt and pepper, but remember you can adjust later after you’ve cooked them. While mixing, lay out your tortillas on a clean surface, ready for filling. Also, preheat your skillet on medium heat to get it nicely warm and ready for that satisfying sear.
Step 2 — Cook with Confidence
Take a generous scoop of the chicken-cheese mixture and spread it evenly onto each tortilla. Roll these up tightly so none of the filling escapes during cooking—trust me, you want a neat package. Heat about a tablespoon of olive oil in your skillet over medium heat, and place each wrap seam-side down first to seal it in place. Cook each side around 3-4 minutes until you see a lovely golden-brown color with crispy edges forming. You’ll smell the garlic and cheese melting slowly, which is always a comforting sign your wraps are just about ready.
Step 3 — Finish & Serve
Once all sides are crisped to your liking, remove the wraps carefully to a cutting board. Let them rest a minute; this helps the cheese inside set just enough so it won’t ooze everywhere when sliced. Slice each wrap diagonally—this always looks more appealing and shows off the gooey center. If you want, sprinkle a little extra fresh parsley or a pinch of black pepper to finish. Serve warm for that ultimate molten-cheese experience. Trust me, the first bite with the crunchy outside and creamy garlic filling is pure joy.
Extra Helpful Tips
I’ve made these wraps dozens of times, and here’s some insider scoop to make sure yours turn out just right every single time.
- Watch for This Sign: When your wraps sizzle gently and the bottom is golden brown, it’s perfect time to flip.
- Temperature Trick: Keeping the heat on medium ensures you melt the cheese inside without burning the tortillas outside.
- Prep-Ahead Option: Mix your filling the night before to deepen the garlic flavor—just keep it covered in the fridge.
- Avoid This Common Mistake: Don’t overload your wraps or they’ll be tricky to roll and might burst open while cooking.
Serve & Enjoy
Easy Enhancements
Sprinkle a bit of crushed red pepper flakes if you like it spicy, or add a splash of tangy ranch or chipotle mayo as a dipping sauce for extra zing. Fresh basil or cilantro are fantastic if you want an herbaceous twist. For a fresher bite, sliced avocado or a handful of baby spinach inside the wrap adds lovely texture and color.
Tasty Pairings
Pair these cheesy garlic wraps with a side salad tossed in lemon vinaigrette for brightness, or some crunchy carrot sticks and hummus for a lighter crunch. If you’re in a cozy mood, creamy tomato soup matches beautifully and elevates the whole meal. For drinks, a chilled iced tea or a zesty lemonade makes for refreshing companions.
Quick Plating Tips
Arrange the sliced wraps in a fan shape on a warm plate, garnished with a sprinkle of parsley and maybe a wedge of lemon on the side. A small bowl of dipping sauce can be placed nearby — it makes the presentation feel extra inviting and restaurant-worthy with very little effort.
Store, Freeze & Reheat
Fridge Storage
You can store leftover Ooey-Gooey Cheesy Garlic Chicken Wraps in an airtight container for up to 3 days. Keep them chilled and covered well to avoid drying out. When you reheat, you might notice the tortilla softens a bit, but the creamy filling stays rich and satisfying.
Freezer Friendly?
These wraps freeze surprisingly well! Wrap each one individually in foil or plastic wrap and place in a freezer bag. To thaw, move them to the fridge overnight. Reheat gently in a skillet or oven to revive the crispy edges without sogginess.
Reheat Like New
The best way to reheat Ooey-Gooey Cheesy Garlic Chicken Wraps Recipe without losing that cozy texture is in a skillet over medium-low heat. Place wraps seam-side down, cover for a couple of minutes to warm the filling, then remove the cover and crisp up both sides to your liking. Avoid microwaving straight away unless you’re in a pinch—microwaving can make tortillas chewy and fillings unevenly hot.
Ooey-Gooey Cheesy Garlic Chicken Wraps Recipe FAQs
Absolutely! While mozzarella offers great melt and mild flavor, feel free to mix in cheddar, Monterey Jack, or even a bit of feta for a twist. Just keep the cheese blend creamy and melty.
Rolling the wraps tightly and cooking seam-side down first helps seal them up. Also, avoid overfilling to keep the wraps intact as the cheese melts and the tortillas crisp up.
Yes! Preparing the filling the night before actually lets the flavors meld beautifully. Just keep it well covered in the fridge, and assemble the wraps right before cooking.
You can swap the chicken for cooked mushrooms, roasted veggies, or your favorite plant-based protein to keep it vegetarian. The cheesy garlic mixture still offers plenty of rich flavor.
Final Flavor Thoughts
I hope you enjoy making and sharing this Ooey-Gooey Cheesy Garlic Chicken Wraps Recipe as much as I do. It’s an easy recipe with friendly ingredients but a feel-good finish every time. If you try it, I’d love to hear how it turns out—drop a star rating or tell me about your favorite tweaks! Maybe next time, you’ll add some spicy jalapeños or swap in a smoky cheese. Either way, these wraps are bound to become a go-to for cozy, cheesy meals.
Print📖 Recipe
Ooey-Gooey Cheesy Garlic Chicken Wraps Recipe

These Ooey-Gooey Cheesy Garlic Chicken Wraps are a deliciously creamy and savory meal featuring tender shredded chicken blended with melted mozzarella and cream cheese, enhanced by fresh garlic and parsley. Wrapped in large tortillas and pan-seared to a golden crisp, they make a perfect easy-to-make lunch or dinner option that’s packed with flavor and comfort.
- Prep Time: 10 minutes
- Cook Time: 8 minutes
- Total Time: 18 minutes
- Yield: 4 wraps
- Category: Lunch
- Method: Frying
- Cuisine: American
Ingredients
Filling
- 2 cups cooked chicken, shredded
- 1 cup shredded mozzarella cheese
- ½ cup cream cheese, softened
- ¼ cup garlic, minced
- ¼ cup fresh parsley, chopped
- Salt and pepper to taste
Wraps
- 4 large tortillas
- 1 tablespoon olive oil
Instructions
- Prepare the filling: In a large bowl, combine the shredded chicken, mozzarella cheese, cream cheese, minced garlic, and chopped parsley. Mix everything well until the mixture is evenly combined and creamy.
- Season the mixture: Add salt and pepper to taste, ensuring the filling has a balanced savory flavor.
- Assemble the wraps: Lay out the tortillas flat and evenly distribute the chicken and cheese mixture onto each tortilla.
- Roll the tortillas: Tightly roll up each tortilla to form neat wraps, making sure the filling is secure inside.
- Heat the skillet: Place a skillet over medium heat and add the olive oil, allowing it to warm up before cooking the wraps.
- Cook the wraps: Place the rolled wraps seam-side down in the skillet and cook for 3-4 minutes per side, or until all sides are golden brown and crispy.
- Serve: Remove the wraps from the skillet, slice if desired, and serve warm for a gooey, flavorful experience.
Notes
- You can substitute cooked shredded chicken with rotisserie chicken for convenience.
- Adjust garlic quantity to your preference for mild or strong garlic flavor.
- Use low-fat cream cheese for a lighter option.
- Serve with a side salad or dipping sauce like ranch or marinara for added variety.
- To make it spicier, add chopped jalapeños or a sprinkle of red pepper flakes to the filling.


Leave a Reply