
Raspberry Chia Pudding Sweetened with Maple Syrup Recipe is one of those delightful treats that feels both nourishing and a little indulgent. It’s creamy, packed with tiny bursts of raspberry, and sweetened naturally with maple syrup, which gives it that cozy warmth without any processed sugar. I love making this pudding when I want a quick breakfast that keeps me full or a wholesome dessert that's light but satisfying. If you enjoy fresh fruity flavors mixed with a smooth, pudding-like texture, you’re going to adore this — it’s truly a crowd-pleaser for all ages!
Jump to:
What Makes This So Good
This pudding manages to be creamy and luscious without any dairy, thanks to the magic of chia seeds soaking in your favorite milk. The maple syrup ties everything together with gentle sweetness and subtle caramel notes that complement the fresh-tart raspberries perfectly.
- Big Flavor, Minimal Fuss: You combine a handful of simple ingredients, stir, and let nature do the rest — no stovetop cooking required.
- Family-Friendly: Kids love the naturally sweet berry flavor, and it’s a mindful treat parents feel good about serving any time of day.
- Simple Ingredients: Just chia seeds, maple syrup, raspberries, and milk — easy to find and easy to love.
- Works Any Night: Make it the night before for effortless mornings or a refreshing snack after dinner.
Ingredient Guide

Let’s chat about the ingredients so you can customize your Raspberry Chia Pudding Sweetened with Maple Syrup Recipe exactly how you like. Picking the right options really amplifies the flavor and texture.
- Chia Seeds: Use fresh, whole chia seeds—they swell up beautifully and create that silky gel texture we’re after.
- Maple Syrup: Choose 100% pure maple syrup for a rich, natural sweetness that’s warmer and rounder than honey or agave.
- Raspberries: Fresh is best if they’re in season, but frozen works just as well—just thaw slightly for easier blending.
- Milk: Any milk you prefer works—almond, oat, or classic dairy. I personally love using unsweetened almond milk for a light base that lets the raspberries shine.
Quick Reminder: Full measurements are in the recipe card below. Feel free to adjust sweetness or milk type to suit your taste!
How to Make Raspberry Chia Pudding Sweetened with Maple Syrup Recipe
Step 1 — Prep & Ready
Start by rinsing your raspberries gently to preserve their delicate texture. If you’re using frozen ones, let them thaw enough so they’re soft but not mushy—that helps blend them smoothly without watering down the pudding. Grab your chia seeds and maple syrup, and have your milk nearby so you can pour and mix right away. No need for fancy gadgets here—a simple bowl and spoon will do just fine.
Step 2 — Cook with Confidence
Okay, so this chia pudding doesn’t exactly “cook,” but you’ll whisk the ingredients together for silky smoothness. Start by slightly mashing or blending the raspberries with maple syrup to create a vibrant, fruity base. Then pour in your milk and sprinkle the chia seeds over the top. Whisk everything until evenly combined — you’ll notice the liquid already thickening and turning a beautiful rosy hue. Cover the bowl and pop it in the fridge for at least 4 hours, or overnight. This waiting time is where the magic happens as the pudding sets to creamy perfection.
Step 3 — Finish & Serve
Give your pudding a good stir before serving. You want to check that luscious creamy texture with tiny jewel-like raspberry seeds throughout. If it’s too thick for your liking, just stir in a splash more milk. Taste it and add a touch more maple syrup if you want a sweeter treat. Serve in pretty glass jars or bowls, topped with fresh raspberries, a few crunchy nuts, or maybe a sprinkle of coconut flakes for extra texture and flair!
Extra Helpful Tips
Making this Raspberry Chia Pudding Sweetened with Maple Syrup Recipe feel effortless is all about timing and the right technique. Let me share some pointers from my own kitchen experience.
- Watch for This Sign: The pudding is ready when it's thick and spoonable, with no crunchy chia seeds.
- Temperature Trick: Use cold milk for a smoother set, and whisk well to prevent clumps from forming.
- Prep-Ahead Option: Make it the night before for an easy grab-and-go breakfast or after dinner treat.
- Avoid This Common Mistake: Don’t skip stirring the pudding at 30 minutes to redistribute seeds and prevent clumping.
Serve & Enjoy

Easy Enhancements
Add a swirl of Greek yogurt on top for tangy creaminess, or sprinkle a pinch of cinnamon or vanilla powder to complement the sweetness. Fresh mint leaves bring a refreshing pop that plays beautifully with the raspberry’s bright flavor. For crunch, try crushed almonds or granola for a delightful texture contrast.
Tasty Pairings
Pair this pudding with a warm cup of chai tea or your favorite coffee for a well-rounded morning lift. It also goes wonderfully alongside a slice of whole grain toast slathered with nut butter if you need something heartier. For dessert-time, fresh fruit salad or a small handful of dark chocolate chips make delightful companions.
Quick Plating Tips
Serve your pudding in clear glass cups to show off those gorgeous pink layers. Top with whole raspberries, a drizzle of maple syrup, and a sprig of mint for an Instagram-worthy finish. Using a small spoon to create gentle swirls in the pudding itself before adding toppings brings a lovely artisanal touch.
Store, Freeze & Reheat
Fridge Storage
You can store this pudding in airtight containers in your fridge for up to 4 days. Over time, the chia seeds absorb more liquid, so you might notice a thicker texture — just stir in a splash of milk before serving to return it to that perfect creaminess.
Freezer Friendly?
Chia pudding doesn’t freeze well because the seeds can separate and change texture, leading to a watery mess when thawed. I’d recommend fresh prep for the best consistency and flavor every time.
Reheat Like New
This pudding is best enjoyed chilled, but if you’d prefer it warmed, gently microwave in short bursts, stirring in a bit of milk to keep things smooth and creamy—just be careful not to overheat or it can become thick and gluey.
Raspberry Chia Pudding Sweetened with Maple Syrup Recipe FAQs
Absolutely! Just thaw them slightly so they’re easier to blend and not too watery. Frozen raspberries work well and make this recipe super versatile year-round.
Any milk you love works here. I usually go with almond or oat milk for a lighter texture, but dairy milk or even coconut milk add great creaminess and flavor. Just avoid flavored milks unless you want to change the taste.
Typically 4 hours or overnight is perfect. You can check after 2 hours and give it a stir, but the pudding is smoothest and most set after sitting overnight.
You can, but maple syrup adds a unique depth of flavor and a less intense sweetness. Honey is sweeter and can change the taste slightly, but it’s a fine option if needed.
Final Flavor Thoughts
I hope this Raspberry Chia Pudding Sweetened with Maple Syrup Recipe finds a cozy spot in your meal rotation! It’s so satisfying to make something this healthy and delicious with almost no effort. If you try it out, please leave a star rating or drop a comment sharing your favorite toppings or twists — maybe a swirl of lemon zest or toasted coconut next time? Happy pudding making!
Print📖 Recipe
Raspberry Chia Pudding Sweetened with Maple Syrup Recipe

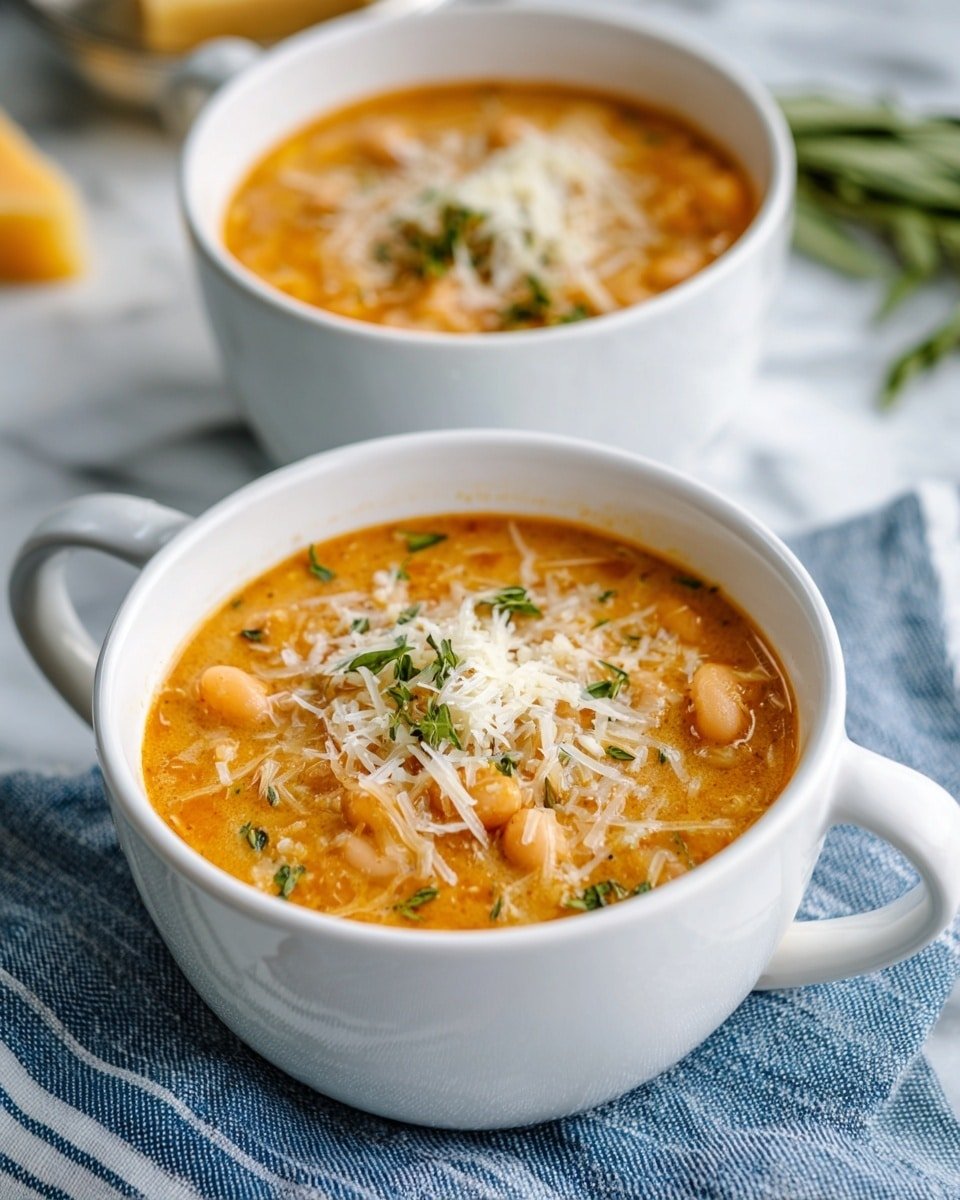
This White Cheddar & Apple Chicken Chili is a comforting and flavorful twist on traditional chili, combining tender rotisserie chicken, sweet apples, and creamy white cheddar in a rich and thick broth. The blend of chili powder and cumin adds a warm, mildly spicy depth while cannellini beans add heartiness. Perfect for a cozy meal, this chili is easy to prepare on the stovetop and brings a unique balance of savory and sweet flavors.
- Prep Time: 10 minutes
- Cook Time: 25 minutes
- Total Time: 35 minutes
- Yield: 6 servings
- Category: Soups and Stews
- Method: Stovetop
- Cuisine: American
Ingredients
Main Ingredients
- 2 cups chopped rotisserie chicken
- 2 tablespoon olive oil
- 2 tablespoon chili powder
- 2 teaspoon ground cumin
- 2 apples, peeled and roughly chopped
- 1 white onion, peeled and roughly diced
- 4 tablespoon butter
- ¼ cup flour
- 2 ½ cups chicken broth
- ¾ cup half & half
- 2 15 oz cans cannellini beans, drained
- 2 cups shredded Mexican blend cheese
- Salt & pepper to taste
Instructions
- Sauté Apples and Onion: Heat 2 tablespoons of olive oil in a large Dutch oven or heavy pot over medium heat. Once hot, add the chopped apples and diced onion. Stir to combine, then add the chili powder and ground cumin. Cook, stirring occasionally, for 6 to 8 minutes or until the apples and onions are softened. Transfer this mixture to a plate and set aside.
- Make a Roux: Lower the heat to medium-low. In the same pot, melt 4 tablespoons of butter. Whisk in ¼ cup of flour and cook the mixture for about 60 seconds to remove the raw flour taste, stirring constantly to form a smooth roux.
- Add Liquids: Gradually whisk in the chicken broth, adding a little at a time and combining well before adding more. Then whisk in ¾ cup of half & half. Continue simmering the mixture while whisking occasionally until it thickens, approximately 3 to 5 minutes.
- Combine Chili Base: Stir in the chopped rotisserie chicken, drained cannellini beans, and the reserved apple and onion mixture. Mix until everything is evenly incorporated.
- Adjust Thickness and Add Cheese: Check the consistency of the chili; if too thick, add extra chicken broth to thin it. Otherwise, stir in the shredded Mexican blend cheese until fully melted. Season with salt and pepper to taste.
- Serve: Ladle the chili into bowls and serve hot with your favorite toppings such as additional cheese, sour cream, or fresh herbs.
Notes
- This chili is intentionally thick; adjust the broth to achieve your preferred consistency.
- Using rotisserie chicken not only saves time but adds extra flavor.
- Mexican blend cheese usually includes cheddar, Monterey Jack, and other cheeses, but white cheddar alone can be a good substitute.
- For a spicier chili, consider adding diced jalapeños or a pinch of cayenne pepper when sautéing the apples and onions.
- Store leftovers in an airtight container in the refrigerator for up to 3 days. Reheat gently on the stovetop.


Leave a Reply